So I've been fermenting my own foods a bit these days. And I've also been tooting my own horn, if ya know what I mean... The kids are finding that pretty hilarious. Might take me a week to get used to all the fizz in mah belly methinks.
 |
| Home-made Apple Kefir - the fizzy gettin' bizzy in mah belly |
There's a lot of information about the benefits of probiotics available these days. But it makes sense to me to try and access these valuable organisms in the most natural way possible, rather than blindly trusting some company that shoves my little critters into capsules at a factory somewhere.
A friend told me, in secret, that she fermented her own food. She's pretty bloody 'normal' so that encouraged me to explore the idea. Ivy from Paleo in Melbourne often featured fermented products in her blog and, again, I was intrigued.
But then I saw pictures of crazy looking jars and detailed and lengthy instructions and caveats and too much friggin' hard work frankly.
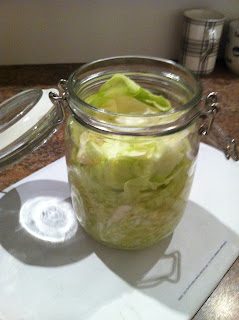
Well last week I gave it a go. I made sauerkraut. I followed my own version of my friend's recipe (see below) and left the single jar of goodness on a shelf for 5 days, patiently waiting for something magical to happen. And guess what? It did! Bloody deliciousness. My next project is pickled carrot and daikon - just trying to get the sugar balance right (sugar is mostly eliminated through the fermentation process but not entirely).
The other thing I tried was apple kefir (see above). I added one sachet of kefir to a bottle with a stopper ($1.50 at Ikea), along with approximately 300ml of organic cloudy apple juice and topped up the bottle with water. I left this mix on the kitchen bench for 24hrs then refridgerated. The result tastes like apple cider without the buzz. I have managed to make another four batches by retaining half a glass of the mixture in the bottom of the bottle and re-doing the other three steps. This mix is cheaper than buying a bottle of organic fizzy and a half a dozen probiotic capsules and it took less than 10 seconds to make.
Here's my version of Sarah's Sauerkraut.....
1 large
green cabbage - thoroughly washed and dried
2 x Granny smith apples - peeled and shredded in grater
1 teaspoon of raw honey
Himalayan Crystal Salt 1
teaspoon
1 sachet Body Ecology
starter culture
1. Sterilise
a mason jar ($4 at Ikea) in boiling water for ten minutes
2. To make
starter mix: mix honey, culture starter, ½ cup filtered water
3. Set aside
some big clean cabbage leaves. You will leave these as seals for the jar
4. Get a large
bowl. Slice
cabbages and add to the bowl. Scrunch the cabbage to try to bruise it (did this a couple of times)
5. Mix in all
the ingredients together, scrunching. You may need to do a few batches
depending on the size of your bowl. Don’t forget the salt.
6. Pack it
tightly in the jar. Pour in starter culture mix. DO NOT GO HIGHER THAN 3CM FROM TOP OF JAR.
7. Push it all
down and pack it in as much as you can. Make sure
liquid covers all ingredients. Add filtered water if required.
8. Place cabbage leaf on top to ‘seal’ the veggies in
9. Firmly secure
lid of jar and place on tray to catch any overflowing juices. Put in a dark
place – i.e. in the cupboard with a towel on it.
10. Leave 3-5
days for crunchy, 10 days for softer texture. DON’T OPEN
WHEN FERMENTING.
Once
fermented place in fridge. After
opening jar, keep ingredients moist. Stored correctly unopened cultured veges
last 5 months in fridge and opened for 6 weeks.

No comments:
Post a Comment